Template TOU
They are for Personal Use ONLY.
Do NOT share in groups/forums etc. have them come to my blog to download them for themselves.
You can use my templates for tutorials as long as you credit me and link back to my blog.
You CANNOT supply them for your tutorials either.
Wednesday, December 30, 2009
 In Need of a Blinkie?
Do you need a blinkie?
Well I have a great deal for you.
The staff of Tut Stop want to keep the forum ad free
and to do so we are taking donations.
If you are a member of Tut Stop and....
Donate $2 you can get a 150x50 blinkie.
Donate $3 and you get a 465x70 banner.
For more details please visit Tut Stop and PM one of the Admins.
Some Examples


Tuesday, December 29, 2009
 Award Time

I received this award from my dear friend Vicki. She is an awesome scrap kit making!
You need to check out her blog and kits Pink Princess Scraps.
I also got this award from a great girl Tiffany. She is an awesome tagger and has some great tuts on her blog Sweet Southern Comfort Creations, you should check them out.
Thank you so much ladies for this award it means alot!! *hugs*
The rules are:
Put the name and link of who gave you this award on your blog
and pass it on to 5 blogs which you think are AWESOME!!!
I pass it on to:
Cora
Cin
Dreamy
Kat
BlackCat
Tuesday, December 15, 2009
 Looking For a Tutorial???
Are you looking for a certain tutorial? Do you want to show off your tutorials more?
If you answered yes to either of these questions, then I have the perfect place for you.
TUT STOP!!
Its a new forum a few friends and I have started. We hated to see the real tutorial hunter close her doors after so long that we decided to dedicate a forum just for tutorials.
Anyone can join you don't have to be a tutorial writer. There are tutorials and games. A fun place for everyone!
Come and Join Us!

Wednesday, December 2, 2009
 Award Time!!
I received award from Vicki, Cherry, and Artmama
Thanks ladies! This means a lot. *hugs*
Be sure to check out these wonderful ladies' blogs they have some great Scrap kits, Tuts, and Templates.

Thanks ladies! This means a lot. *hugs*
Be sure to check out these wonderful ladies' blogs they have some great Scrap kits, Tuts, and Templates.

Now, this one requires me to tell 10 things about me...
1. I'm original from Nashville TN
2. I'm 6ft
3. I've been playing the piano since I was 8
4. I'm nice but I can be a royal bitch too LOL
5. When I concentrate on something I was lick my lips at least 10 times
6. I just started drinking coffee
7. I love Fall and Winter
8. I'm a big 80s fan
9. I love decorating for every holiday
10. I've lost 15lbs in the last month YAY!! Go me LOL
Okay, that was 10 highly interesting facts about me, now I must pass the award on to 9 bloggers.. I'll have to see who hasn't received it.
Tuesday, October 13, 2009
 Halloween and Autumn Templates

Over at the Rac Stalker Forum we had a challenge to create Halloween and Autumn templates. Here are the templates I made for the challenge. Check out the forum I pretty sure you'll become a Rac Stalker instantly.

You can grab them HERE
Monday, September 28, 2009
 A note and new tuts
I'm in the process of moving my tuts over to Double Vision where Manda K has been nice enough to let me host my tuts there.
Thanks Hun!
I will keep this blog open to announce my newest tuts. I will leave a link to each tut where you can find them. :)
Now with that said I have two new tuts for you.
Thanks Hun!
I will keep this blog open to announce my newest tuts. I will leave a link to each tut where you can find them. :)
Now with that said I have two new tuts for you.
Sunday, September 6, 2009
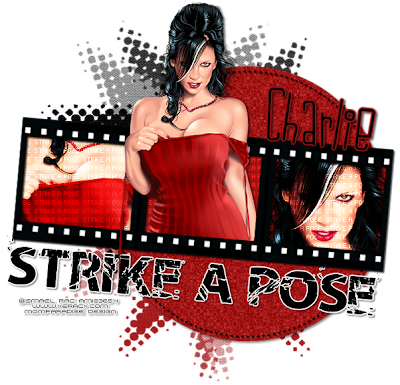
 Sexy Tart

Click on image to view larger
I'm using the awesome artwork of Ismael Rac. You need a license to use his work. You can Purchase one at Artistic Minds Inc.
Supplies:
Tube of Choice
Font of Choice ( I used LDJ Jilly Nilly)
Missy's Template 249 HERE
Vix Mask 382 HERE
Plug Ins:
Xero-Fritillary
Eye Candy - Gradient Glow
Open Missy's template and duplicate (shift+D). Delete original temp and copyright info. Re-size the canvas to 650x600. You can crop it later.
On the circle layer. Select All-Float-De Float.
Open a new raster layer and fill with a color from your tube.
Keep Selected.
Delete original circle layer.
Go to Effects-Xero-Fritillary use these settings:
5, 30, 30, 27.
Select None.
Now add noise of 17 and Gaussian. Mono-chromed are checked.
Add a drop shadow of your liking.
Highlight the Dotted Circle layer.
Adjust-Brightness/Contrast change your brightness to -255
and contrast to 0.
Add a drop shadow.
Highlight the Film Strip background. Select All-Float-De Float.
Open a new raster layer and fill with a color from your tube.
Keep Selected. Delete original layer. Copy and Paste your tube.
Move it to the left square where only part of it is in it.
Invert Selection and hit delete on your keyboard.
Invert Selection again and do the same
thing only with the right square.
Select None.
Duplicate your tube layers.
Add a Gaussian Blur of 3 to the down tube layer and
change the blend mode to overlay or hard light
which ever one looks better for your tube.
Add a drop shadow to the top tube layer.
You want the words layer to be above your tube part layers.
Copy and paste your tube again. Re-size if needed.
Add a drop shadow.
Place this one in the middle square but you want it above the film strip layer.
We want it to look like it is coming out of the film strip.
Highlight the film strip layer Select All-Float-De Float.
Now erase the bottom part of your tube that is covering the strip.
You might have to erase some of the right of
the tube if you use the same tube as I did.
Now Invert Selection and erase the rest of the bottom of the tube.
Select None.
Highlight the Strike a Pose layer. Go to Effects-Eye Candy-Gradient Glow and add a thick white glow. Everyone using different types of Eye Candy so I leave
it up to you what the setting should be.
:)
Add a drop shadow
Now you should crop it to where its the size you want.
Add a new raster layer above the white background.
Flood Fill with a color from your tube.
Add another new raster layer and fill with another color from your tube.
Onthe first layer apply Vix's Mask 382. Merge Group. Move it to the top left.
Do the same for the second layer but Flip it.
Add your Name and add the same Gradient Glow but use a color from your tube.
Add a drop shadow.
Add your copyright. Delete the white background layer.
Merge Visible and save to your computer as a PNG.
You're Done!
Thanks for trying my tutorial. Hope you had fun!!
Tuesday, August 25, 2009
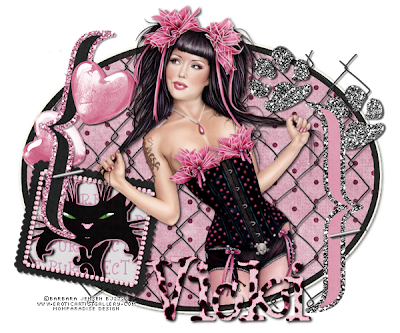
 Little Sex Kitten

click on the image to view larger
I'm using the awesome artwork of Barbara Jensen. You need a license to use her work. You can purchase one on her website HERE.
Supplies:
Tube of Choice
Font of Choice ( I used 0 Whoa DNA)
Scrap kit "Sex Kitten" by Vicki. You can purchase it HERE or HERE.
No outside plug ins needed
Got it all? Good, Let start.
Open a new canvas 600x500, flood fill white.
Using the Ellipse Tool, draw out a fairly large oval. Convert to Raster. Now go to Selections-Select All-Float-De Float. Copy and Paste Paper 8. Invert selection and
hit delete on your keyboard. Keep Selected and Invert again. Selections-Modify-Expand by 10. Copy and Paste Paper 2. Invert Selection and hit delete on your key
board. Invert Selection one more time (LOL I promise last time). Selections-Modify-Expand by 8. Add a new raster layer and flood fill with white. Select None. Move
the white layer below the paper 2 layer and merge together. Add a drop shadow and move this layer below the Paper 8 layer.
Copy and Paste Element 7. Resize by 80%. Add drop shadow.
Copy and Paste Element 53. Rotate 11 right. Add drop shadow and move to the left of the oval near the top.
Copy and Paste Element 54. Add drop shadow and move to the right of the oval near the bottom.
Copy and Paste Element 33. Resize by 45% and Rotate 11 right. Move this to the left and under the Bracket. With your Magic Wand click inside the frame. Go to
Selections-Modify-Expand by 6. Copy and Paste Paper 14, resize the paper by 80%. Invert Selection and hit delete on your keyboard. Select None. Move paper
below frame layer and Add drop shadow to the frame.
Copy and Paste Element 29. Move it to where the cat's face is in the middle of the frame. Highlight the paper 14 layer and Selections-Select All-Float-De Float. Go
back to the cat layer and Invert Selection. Hit delete on your keyboard. Select None. Add drop shadow to the Cat.
Copy and Paste Element 5. Resize by 45% and add a drop shadow. Rotate 7 left. Move to the left making it look like its holding the bracket and frame to the oval.
See my tag for reference. Duplicate and move it to the right so it looks like its doing the same to the other bracket.
Copy and Paste Element 42. Resize by 45% and add s drop shadow. Move to where it is over the left bracket but still with-in the oval. Duplicate layer and move the
original below the bracket, frame, paper, and cat layers. Back tot he copy hearts and erase the heart that is sideways.
Copy and Paste Element 51. Resize by 70% and add a drop shadow. Move to the top right and move it to where it is below all the other elements but just above the
wire layer.
Copy and Paste your tube. Resize if needed. Add a drop shadow. Highlight the small oval layer. Selections-Select All-Float-De Float. Back to your tube layer. Invert
Selection. With your Eraser Tool. erase the bottom part of your tube, making it look like it's inside the oval. See my tag for reference. Select None.
Open Paper 15. Back to you tag. Set the paper to your Background color and your foreground to null. Now type out you name and Convert to raster layer. Add a
strong drop shadow.
Add your copyright. Delete the white background and Merge Visible. Save as a PNG to your computer.
You're Done!!
Thanks for trying my tutorial. Hope you had fun!!
Friday, June 26, 2009
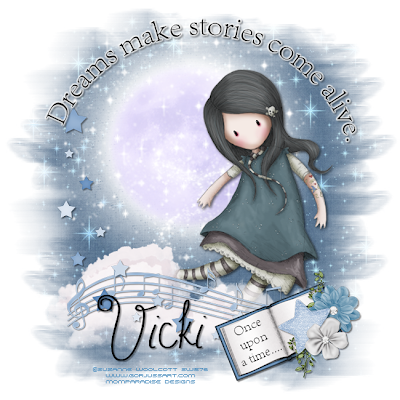
 Story Time
 I'm using the talented artwork of Suzanne Woolcott. You must have a license to use her work, which you can get at GorjussArt.
Supplies:
Tube of choice
Font(s) of choice - I used Hello Kitty and Andalus
Scrap kit "GoodNight My Lil Angel" by Vicki.
You can get it HERE.
Plugin:
Eye Candy - Gradient Glow
Lets go...
Open a new canvus 650x650, flood fill white.
Open up Paper4, resize by pixels to 650, paste as a new layer. Got ot Layers-Load/Save Mask-Load From Disk, find WSL Mask260 and hit ok.
Copy and Paste the Moon, resize by 30%, place it slight to the upper left but staying within the paper mask.
Copy and Paste Cloud2, resize by 15%, place it at the bottom of the mask. see my tag for reference.
Copy and Paste Music Notes, resize by 13%, place it on top of the clouds. Add drop shadow.
Copy and Paste Storybook2, resize by 10% and free rotate it 22 left. Add drop shadow. Place it to the bottom right. Youadd text on the book but you'll need to do it when it's bigger. I typed out "Once upon a time" using Andalus. Once youhave it the way you want, then merge visible.
Copy and Paste Leaves, resize by 10% then again by 50%. Place to the right of the book. Add drop shadow.
Copy and Paste Flower3, resize by 20% then again by 40%, Place to the right of the book. Add drop shadow.
Copy and Paste Flower1, resize by 20% then again by 35%. Add drop shadow. Place to the bottom of flower 3.
Copy and Paste GlitterStar2, resize by 20% then again by 45%. Add drop shadow. Place inbetween flower 1 & 3.
(see tag for reference)
Copy and Paste Starborder, resize by 20% then again by 50%. Mirror and add drop shadow. Place to the left, abovethe music notes but below the book layers.
Copy and Paste tube. Resize if needed. Add drop shadow. Place under cloud layer and to the right.
Set your foreground to black and your background to null. Using your Ellipse tool draw out a nice size circle.Center it. DO NOT convert to raster. Open a new Vector layer. Move your text tool over the circle until you getan A with a curved line under it like this:
Now click and type out any phrase you'd like I typed "Dreams make stories come alive". Now center your text by move itlike you would a regular text. Once happy Convert to raster and delete the circle layer. Add a white gradient glow of choice and a drop shadow.
Add Name and Copyright. Delete the white background and save as png.
And that's it!
Thanks for trying my tutorial. Hope you had fun!!
Subscribe to:
Comments (Atom)
Followers
Labels
- Armando Heurta (1)
- award (2)
- Barbara Jensen (1)
- Camilla Drakenborg (2)
- Collab (1)
- Diana Martinez (1)
- Elias Chatzoudis (5)
- FTU (21)
- FTU Artist (2)
- Ismael Rac (21)
- Jamie Kidd (2)
- Jose Cano (1)
- Kat NKDA (1)
- Keith Garvey (5)
- Legends Art (1)
- No Kit Used (6)
- PinUpToons (1)
- PTU (45)
- Shawli (1)
- Sole Otero (1)
- Susan McKivergan (3)
- Suzanne Woolcott (7)
- Templates (20)
- Tuts (64)
- Unholy Vault Designs (1)
- Zindy S.D. Neilsen (4)


